-
2/18/26
Fixing a Tone Knob
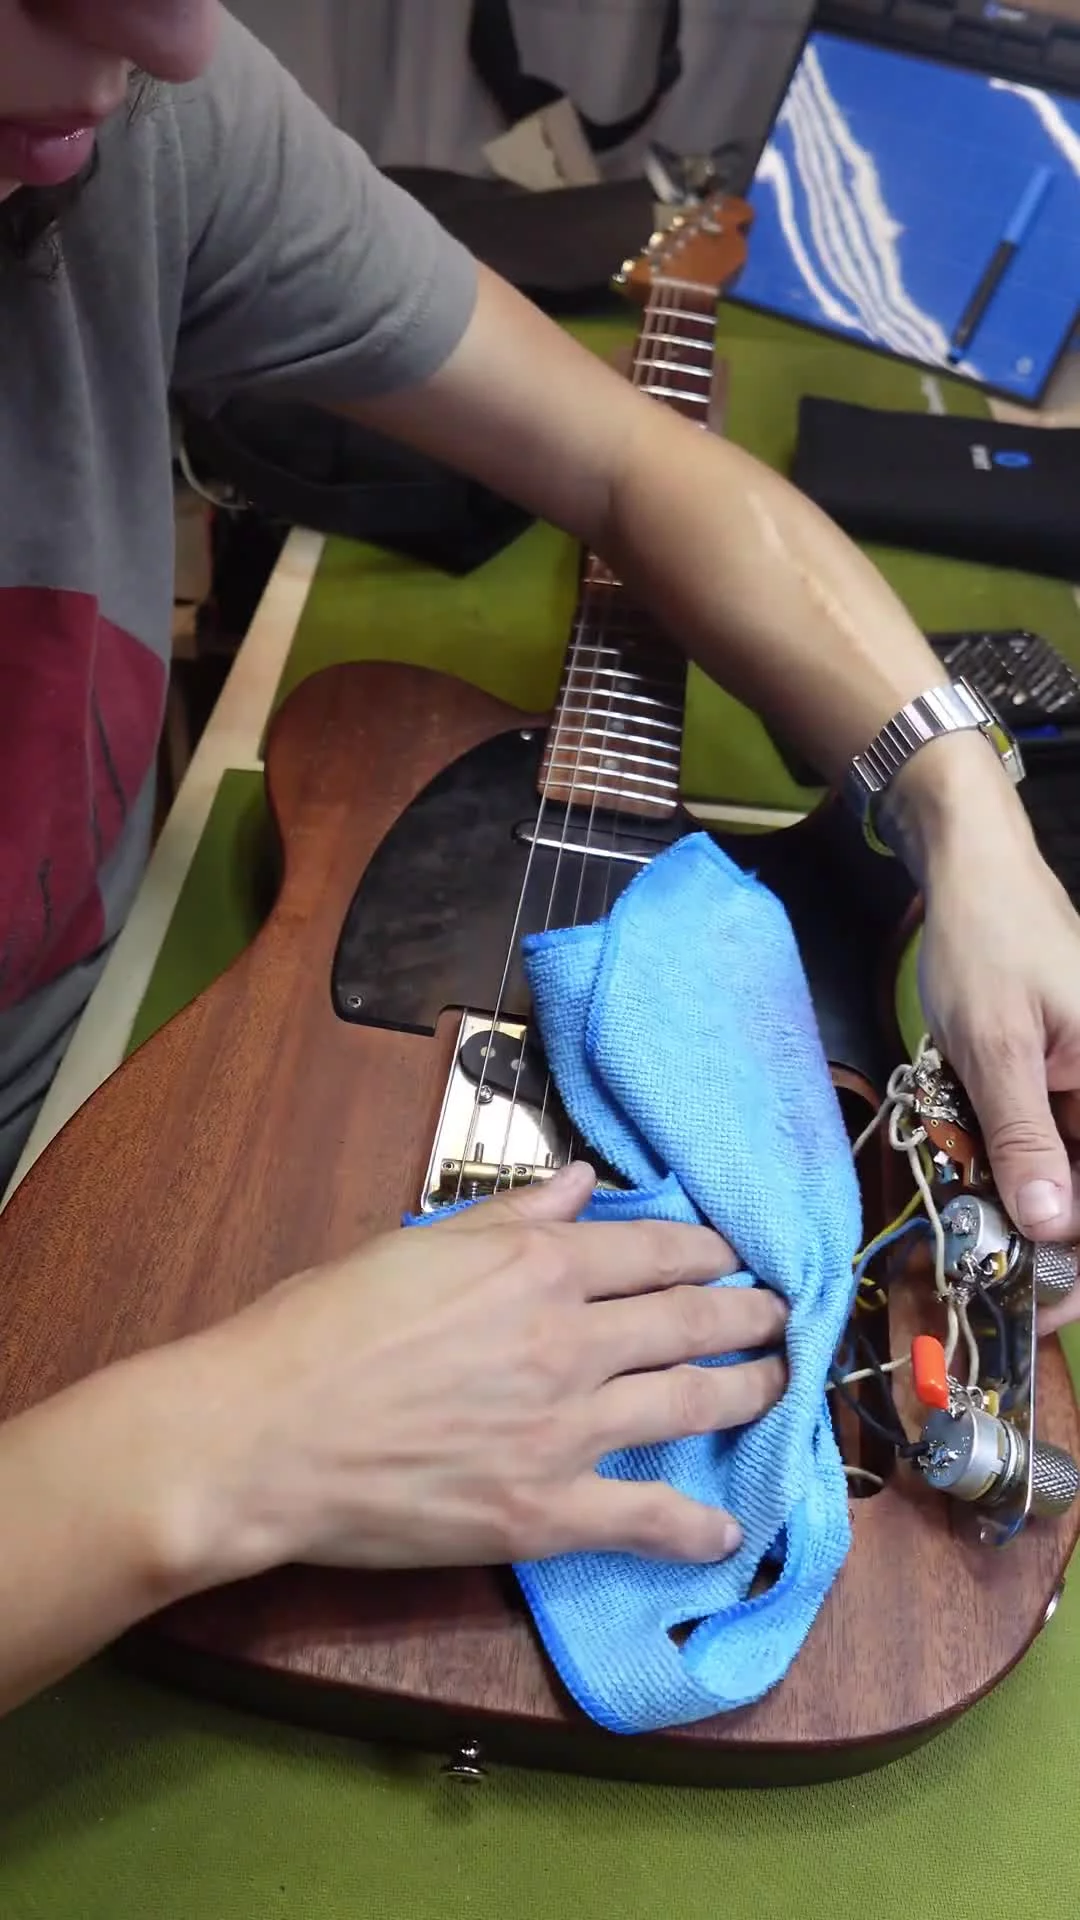
I had a client drop off this parts tele for some work, and now I am going to fix the tone knob. Taking off the control plate immediately showed me the issue at hand. Things were pretty messy in here, and there were a lot of cold solders that needed to be addressed. It appears that this could have been done with soldering iron that was underpowered, or just set to too low of a temperature. The large, chunky blobs on the backs of the pots are a good indicator that thought.
The tone pot was wired in a way that mirrored the volume pot, which is the main reason it was not working. I ungrounded the lug got all of the previous soldering removed to give me a nice, clean surface to start with.
Once everything was cleaned up, I could focus on getting this wired up properly. I moved over the lead from the volume to the tone and got the capacitor reinstalled. This client only wanted me to fix the soldering for the tone knob since they also enjoy working on their own instrument. They told me the leave the rest of the soldering up to them, and they will fix any issues as they arise.
Let me know in the comments if you have any questions about soldering and I can make a follow up video answering the most frequently asked ones.
Once everything was properly connected, I got the control plate reinstalled, and now this guitar is ready for a setup!
-
2/20/26
Answering Your Soldering Questions
I made a video a little while back telling you all to leave your soldering questions in the comments for me to answer- here are some of those questions.
Q: What solder and iron do I use?
A: I use Kester 60/40 with a rosin core for my solder and I swap between my Hakko FX888DX soldering station and my FixHub portable soldering station.
I will have all three of those items linked in my bio if you want to grab them for yourself.
Q: What temperature do I run my iron?
A: I generally run my iron at about 725 degrees fahrenheit or 385 celsius. I will bump it up sometimes in certain instances, but that temperature usually works for me. The idea is to have the iron hot enough to properly heat the bonding surfaces quickly.
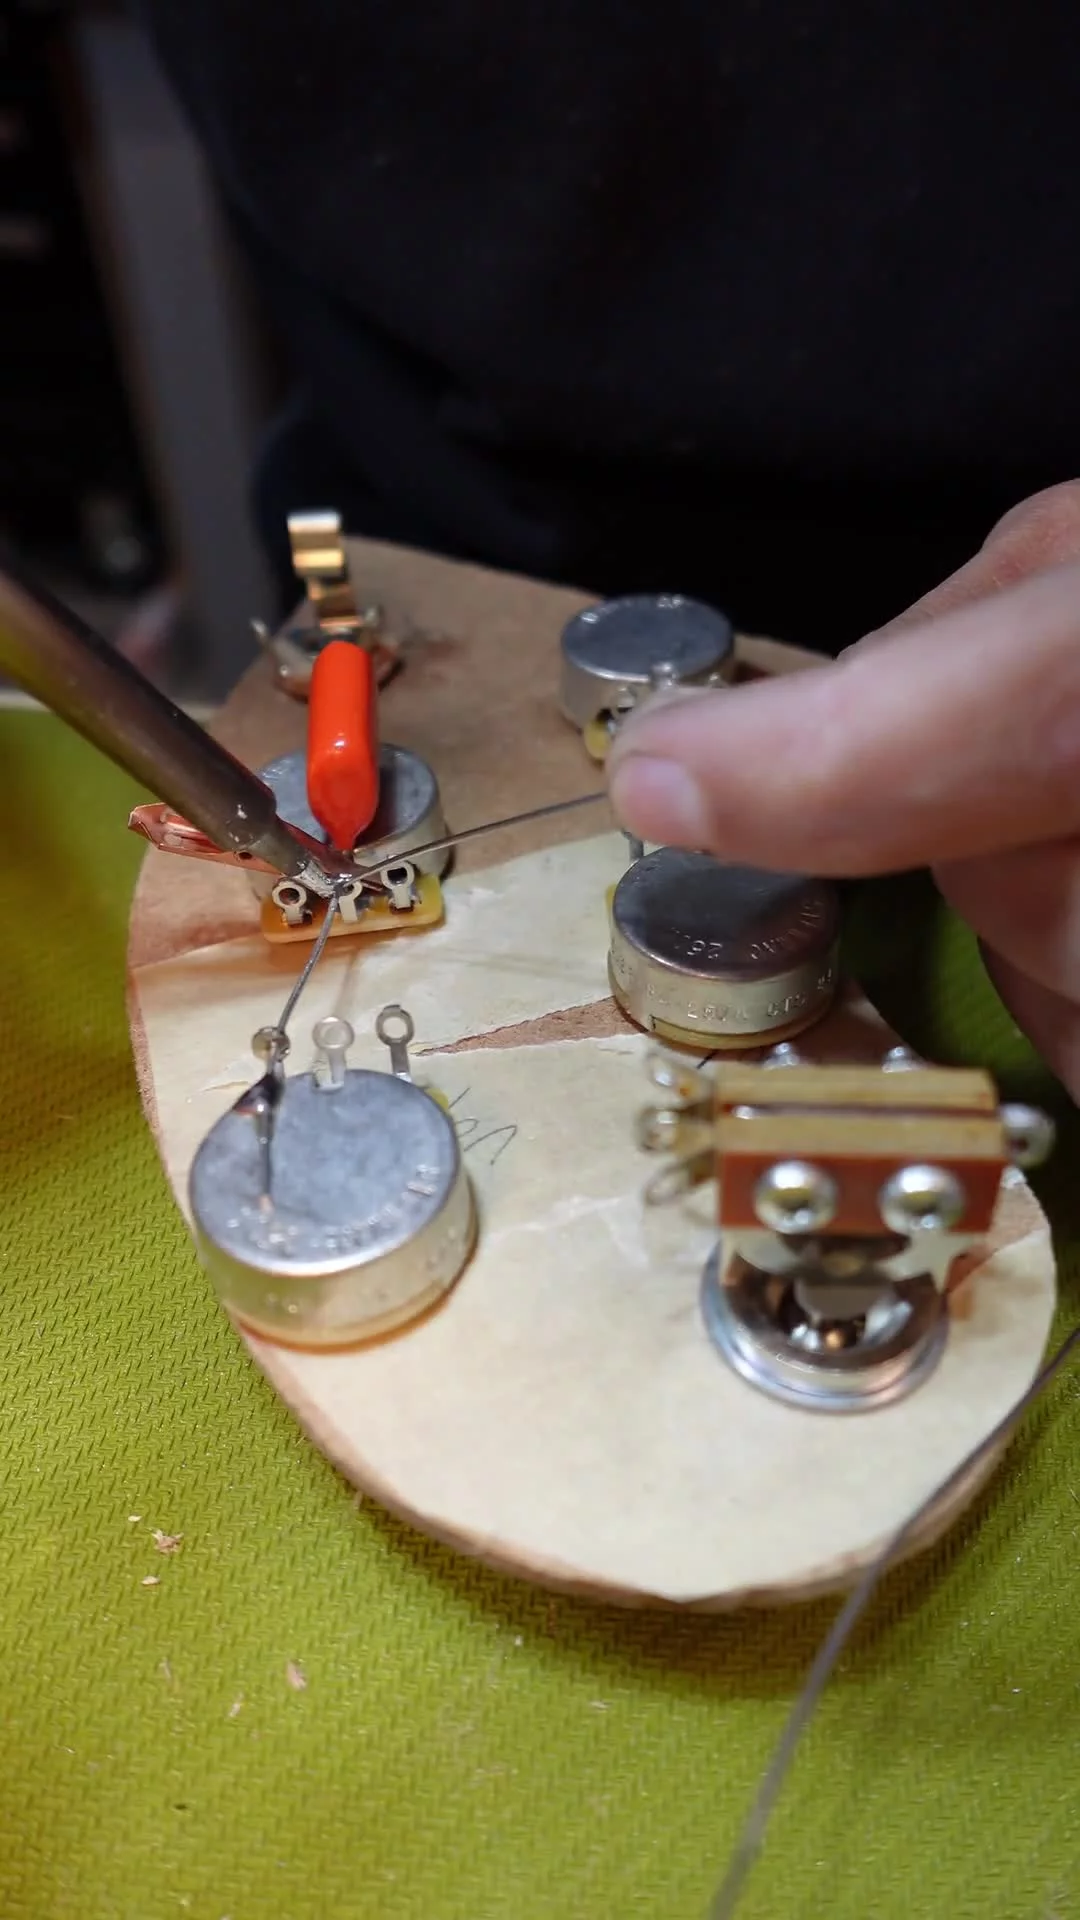
Q: How to get solder to stick to pot casing.
A: When I was first starting soldering this was an issue for me as well. My first problem was that my soldering iron was not sufficient enough to properly heat up the casing. Switching to a 60w was a huge game changer for me, but I think 40 watts would be plenty to get the job done.
The next thing I needed to do was bump up my temperature. I was soldering at about 600 degrees, and that was not enough heat to bring the pot casing to temp in any sort of reasonable time range. The thought that I have is that running a hot iron will heat up the casing quickly enough to get solder to melt on it without allowing that heat to travel to the inner components of the pot. I am to flash the casing with high heat to minimize exposure time.
Q: How do I get nice solder blobs?
A: Getting everything to temp is crucial for this. The solder is attracted to heat, so allowing your pot casing to fully heat will cause the solder to naturally flow to the casing.
Using a larger tip, like a chisel tip, also helps to disperse the heat more quickly. You can see here that I start by placing the tip of the iron onto the casing and running the solder between the iron and the casing. It beads up on the iron tip, but quickly starts running to the casing as the metal heats up. Once that blob plops down onto the pot, I quickly pull my iron straight up and am left with a nice little blob. If your solders are chunky then there likely isn’t enough heat, and if your solder is pooling up, then your iron may be too hot, or you may be sitting on the pot for too long. Let me know if this helped you out at all, and if you have any questions that weren’t covered in this video. I am considering doing these Q and As a couple times a month, so keep the questions coming.
-